Key Takeaways
- Movement acts as natural joint lubrication by circulating synovial fluid.
- Strengthening key leg muscles distributes impact forces away from the worn knee joint.
- Active exercise provides clinically proven pain reduction equivalent to over-the-counter painkillers.
- Detailed step-by-step guides with photographic posture instructions prevent movement errors.
- Low-impact cardiovascular activities support general fitness while shielding the joint.
Why Exercise Helps Knee Arthritis: The Clinical Evidence
When living with knee osteoarthritis (OA), the instinctive response to pain is joint rest. However, extensive clinical research—including meta-analyses published in the Cochrane Database of Systematic Reviews—demonstrates that structured, low-impact exercise is one of the most effective non-surgical treatments for relieving OA discomfort and preserving function.
Joint movement triggers a process known as joint lubrication. Your knee is lined by the synovial membrane, which secretes synovial fluid—a thick, slippery fluid that nourishes articular cartilage and minimizes friction. Because cartilage lacks a direct blood supply, it relies on this fluid circulation to deliver essential nutrients and remove metabolic waste. When you stay inactive, this circulation decreases, leading to joint stiffness and cartilage degeneration. Regular movement acts like a pump, lubricating cartilage surfaces and allowing bones to glide smoothly without grinding.
"Exercise is the single most powerful conservative treatment for knee arthritis, providing clinically significant pain relief and functional improvements."
The Natural Shock Absorbers: Muscles as Joint Protectors
To protect a knee joint affected by cartilage wear, we must focus on the surrounding musculature. The quadriceps (on the front of the thigh), the hamstrings (on the back of the thigh), the gastrocnemius (in the calves), and the gluteal muscles (in the hips) function collectively as your body’s natural shock absorption system.
When these muscles contract, they absorb a substantial portion of the ground reaction forces generated when walking, climbing stairs, or standing. If these muscles are weak, those forces are transmitted directly into the bone-on-bone interfaces of an arthritic joint, accelerating wear and intensifying pain. By progressively strengthening these muscular structures, you create a stable sleeve around the knee, reducing joint load and restoring structural alignment.
Guidelines for Safe Rehabilitation
Before starting any rehabilitation program, keep these rules in mind to ensure safety:
- •Warm Up First: Spend 5 minutes marching in place or doing gentle leg swings to increase blood flow to the muscles and warm up the synovial fluid.
- •The "Two-Hour Pain Rule": It is normal to feel some muscular ache or mild joint discomfort during exercise. However, if joint pain is sharp, worsens significantly, or lasts for more than two hours after completing your routine, you have over-exerted the joint. Reduce the intensity or range of motion next time.
- •Breathe through Exercises: Avoid holding your breath during muscle contraction. Breathe out during the exertion phase and breathe in as you return to the starting position.
- •Maintain Control: Perform all repetitions slowly. Do not use momentum to lift your legs; focus on steady, controlled muscle activation.
1. Isometric Quadriceps Sets (Quad Clenches)
This exercise isolates the quadriceps muscles without moving the knee joint itself, making it highly safe and tolerable during OA flare-ups.
- •Target Muscles: Quadriceps femoris (thigh front).
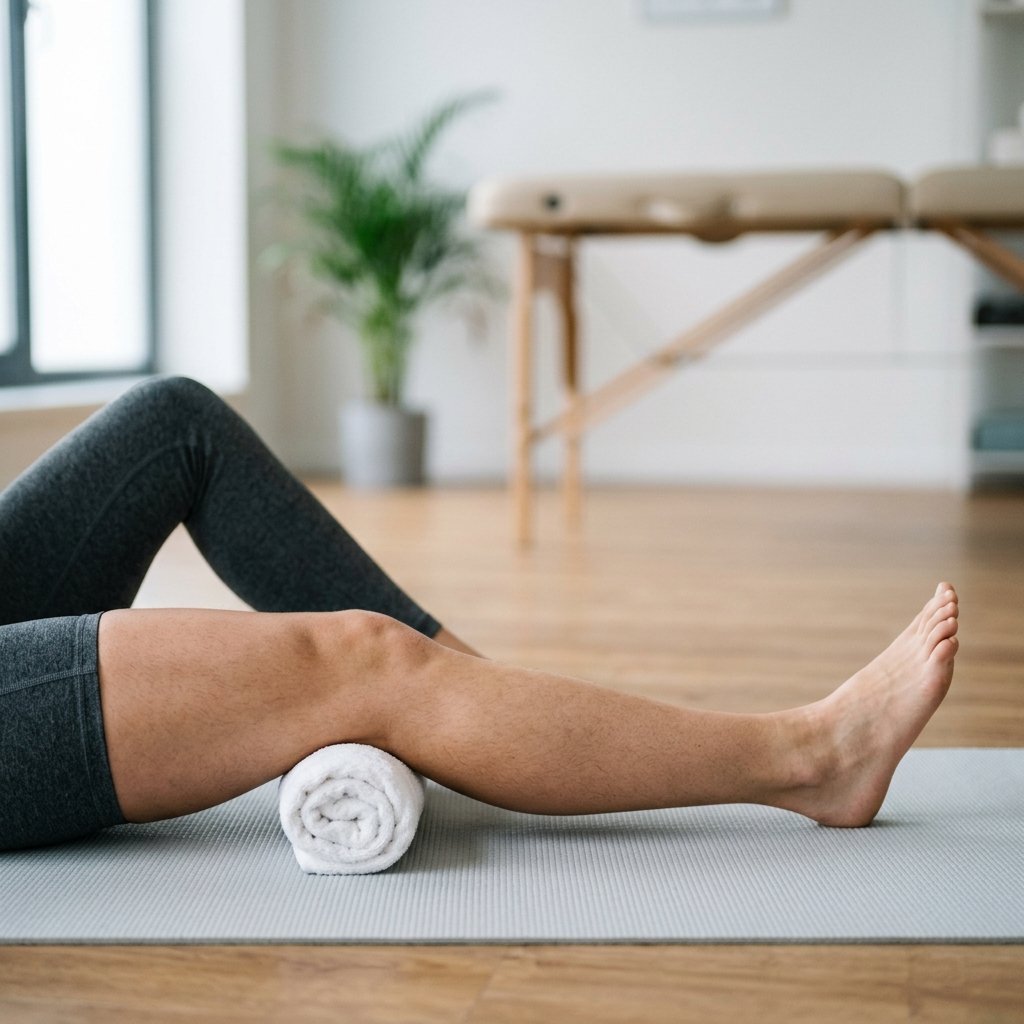
- •Starting Position: Sit upright on a firm surface or lie flat on your back with your legs extended straight. Place a small, rolled-up hand towel directly underneath the knee of the leg you wish to exercise.
- •Execution Steps:
- • 1. Pull your toes back toward your body to flex your ankle.
- • 2. Tighten your thigh muscles by pressing the back of your knee down into the rolled towel.
- • 3. Focus on flattening the back of the knee as much as possible.
- • 4. Hold this tight contraction for 5 to 8 seconds while breathing regularly.
- • 5. Slowly release the contraction and rest for 3 seconds.
- •Prescription: Perform 2 to 3 sets of 10 to 15 repetitions per leg, twice daily.
- •Common Mistakes: Holding your breath; tensing the shoulders or neck; lifting your heel off the ground.
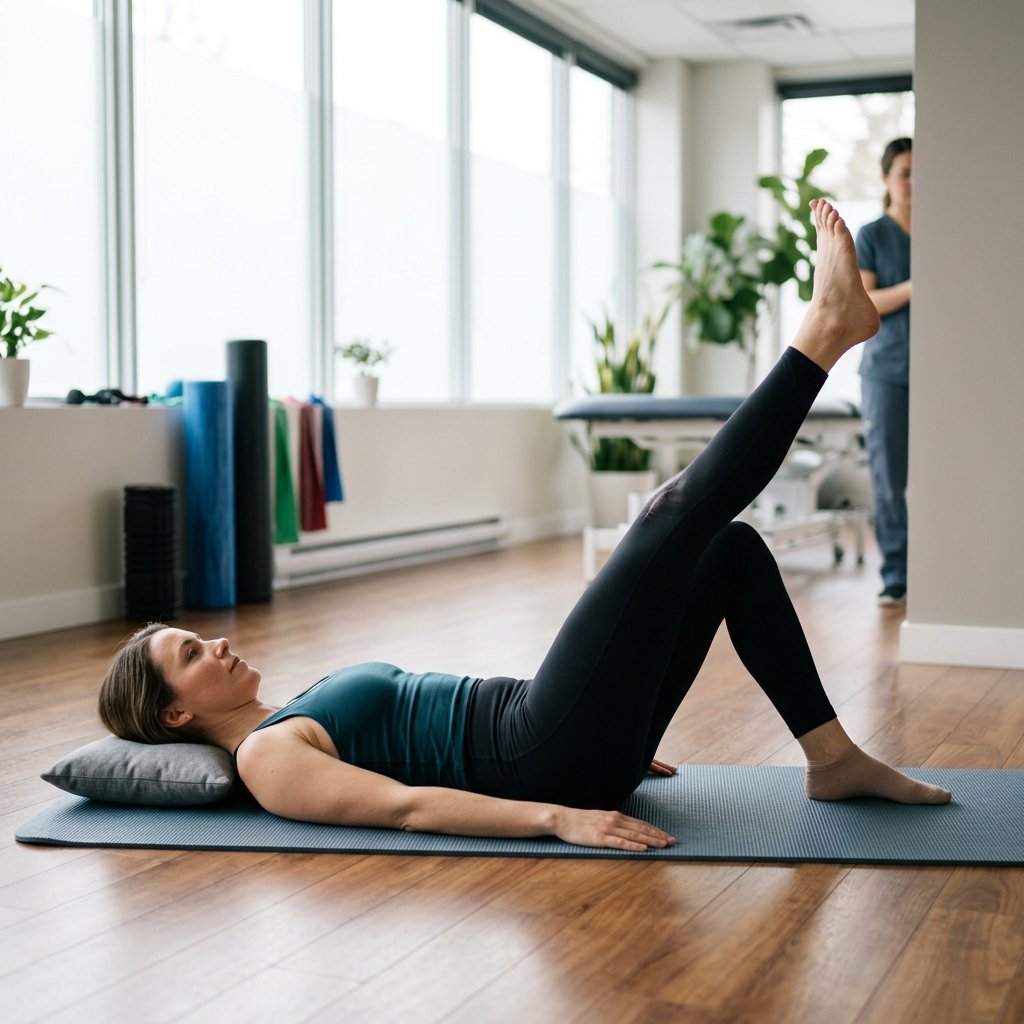
2. Straight Leg Raises (SLR)
Straight leg raises build active quadriceps and hip flexor strength without putting compression forces on the patellofemoral joint.
- •Target Muscles: Rectus femoris (quadriceps) and iliopsoas (hip flexor).
- •Starting Position: Lie flat on your back on a comfortable exercise mat. Bend the non-exercise knee to a 90-degree angle, placing the foot flat on the floor to stabilize your pelvis and lower back. Keep the exercise leg straight.
- •Execution Steps:
- • 1. Engage your core and tighten the quadriceps of your straight leg.
- • 2. Flex your foot toward your shin.
- • 3. Slowly lift the straight leg about 8 to 10 inches off the floor, keeping it in line with the bent knee.
- • 4. Hold the elevated leg steady for 3 to 5 seconds.
- • 5. Lower the leg back to the floor slowly and with complete control.
- •Prescription: Perform 2 to 3 sets of 10 to 12 repetitions per leg, twice daily.
- •Common Mistakes: Raising the leg too high (which strains the hip and back); arching the lower back; bending the active knee.
3. Heel Slides
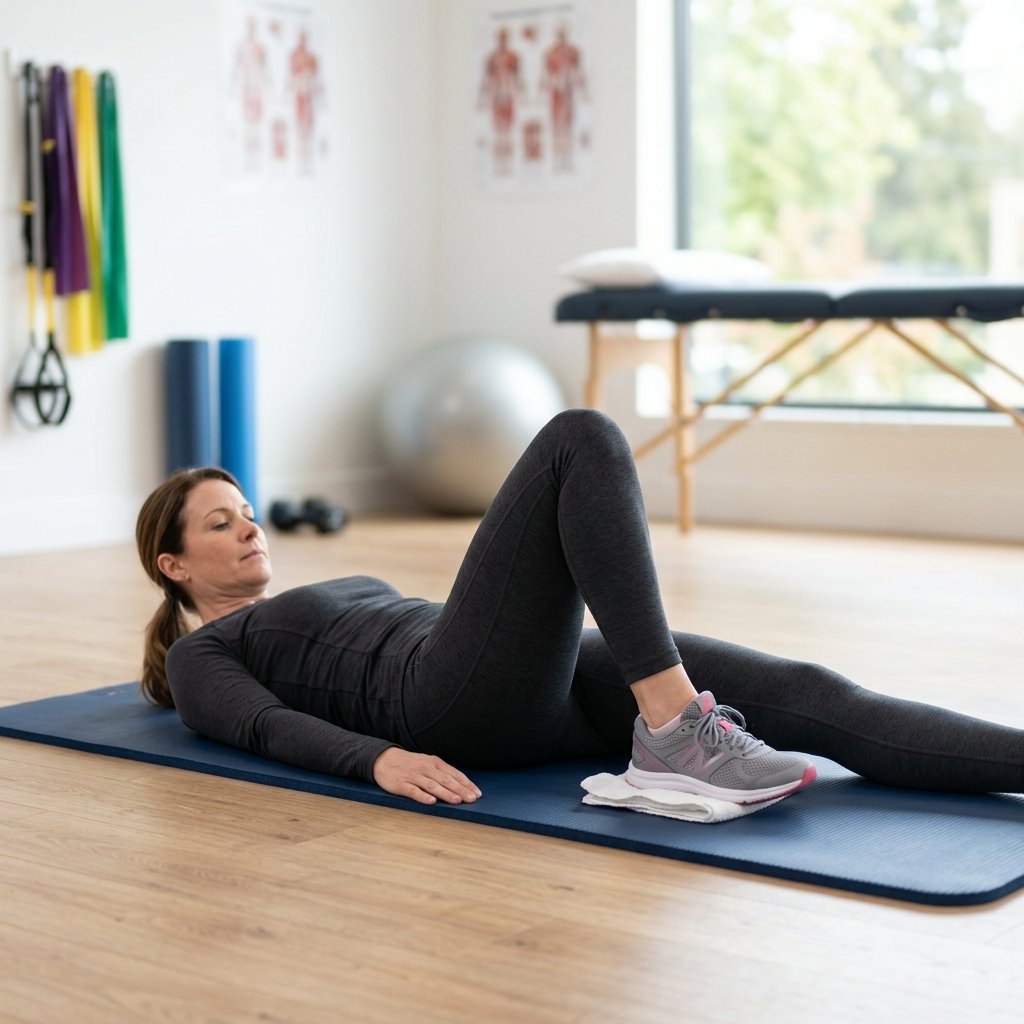
Heel slides promote safe knee flexion and extension, helping to restore and maintain the joint's natural range of motion.
- •Target Muscles: Hamstrings (thigh back), hip flexors, and quadriceps.
- •Starting Position: Lie flat on your back with both legs extended straight.
- •Execution Steps:
- • 1. Slowly slide your heel along the floor or mat toward your buttocks.
- • 2. Bend your knee as far as is comfortable without crossing into sharp pain.
- • 3. Keep your heel in constant contact with the floor.
- • 4. Hold the bent position for 3 seconds.
- • 5. Slowly slide your heel back out to return to the starting position.
- •Prescription: Perform 2 sets of 10 repetitions per leg, once or twice daily.
- •Common Mistakes: Letting the knee fall inward or outward; lifting the heel off the floor; pushing past comfortable range.
4. Short Arc Quads (Knee Extensions over a roll)
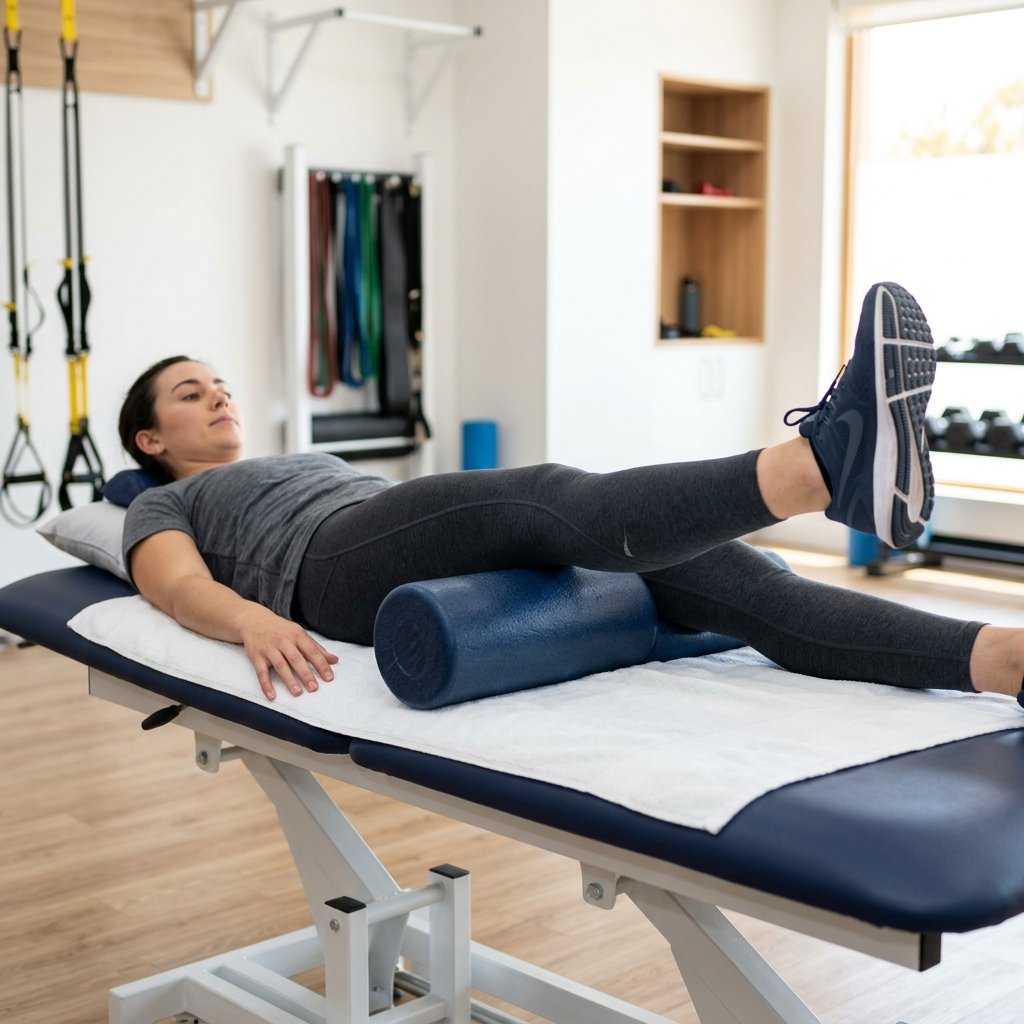
This exercise targets the vastus medialis obliquus (VMO), the inner thigh muscle responsible for patellar tracking and knee stability.
- •Target Muscles: Vastus medialis obliquus (inner quadriceps).
- •Starting Position: Lie on your back or sit comfortably. Place a large rolled-up bath towel, foam roller, or bolster (approx. 6 inches in diameter) under your knees so they are bent at a 30-degree angle.
- •Execution Steps:
- • 1. Keeping the back of your thigh resting firmly on the roll, slowly lift your foot to straighten your knee.
- • 2. Squeeze the quadriceps muscle, especially on the inner side of your thigh.
- • 3. Hold the fully extended position for 3 to 5 seconds.
- • 4. Slowly lower your foot back to the mat.
- •Prescription: Perform 2 to 3 sets of 10 to 15 repetitions per leg.
- •Common Mistakes: Lifting the entire thigh off the roll; performing the movement too quickly; failing to fully straighten the knee.
5. Wall Squats / Slides
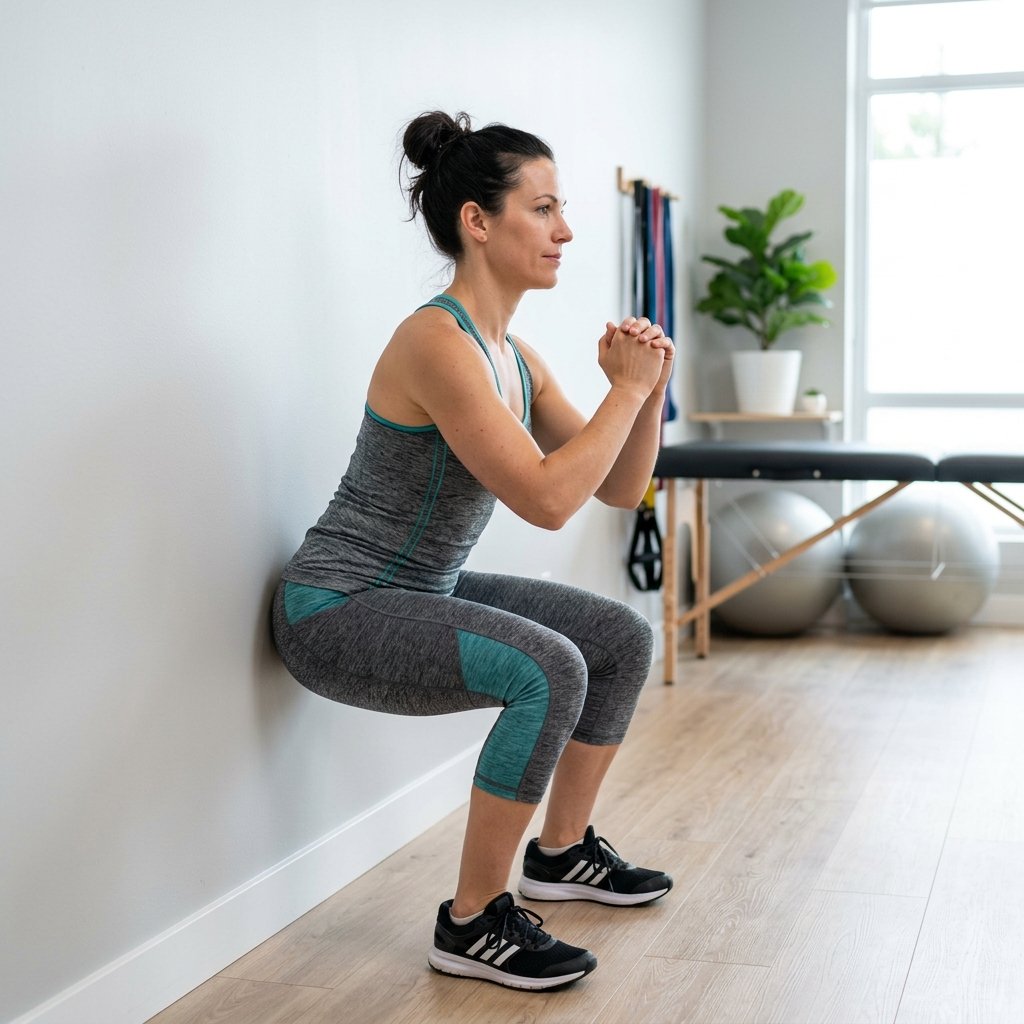
A functional closed-chain exercise that builds strength in the quads, hamstrings, and gluteal muscles to make climbing stairs and rising from chairs easier.
- •Target Muscles: Quadriceps, gluteus maximus, and hamstrings.
- •Starting Position: Stand tall with your back flat against a wall. Place your feet shoulder-width apart and approximately 12 to 18 inches away from the wall.
- •Execution Steps:
- • 1. Engage your abdominal muscles to press your lower back flat against the wall.
- • 2. Slowly slide your back down the wall by bending your knees.
- • 3. Stop sliding when your knees are bent at roughly a 45-degree angle (do not slide past 90 degrees).
- • 4. Ensure your knees do not extend forward past your toes.
- • 5. Hold this semi-squat position for 5 seconds.
- • 6. Slowly slide back up the wall to the starting position.
- •Prescription: Perform 2 sets of 8 to 10 repetitions.
- •Common Mistakes: Squatting too deep (greater than 90 degrees); letting knees collapse inward; sliding down too quickly.
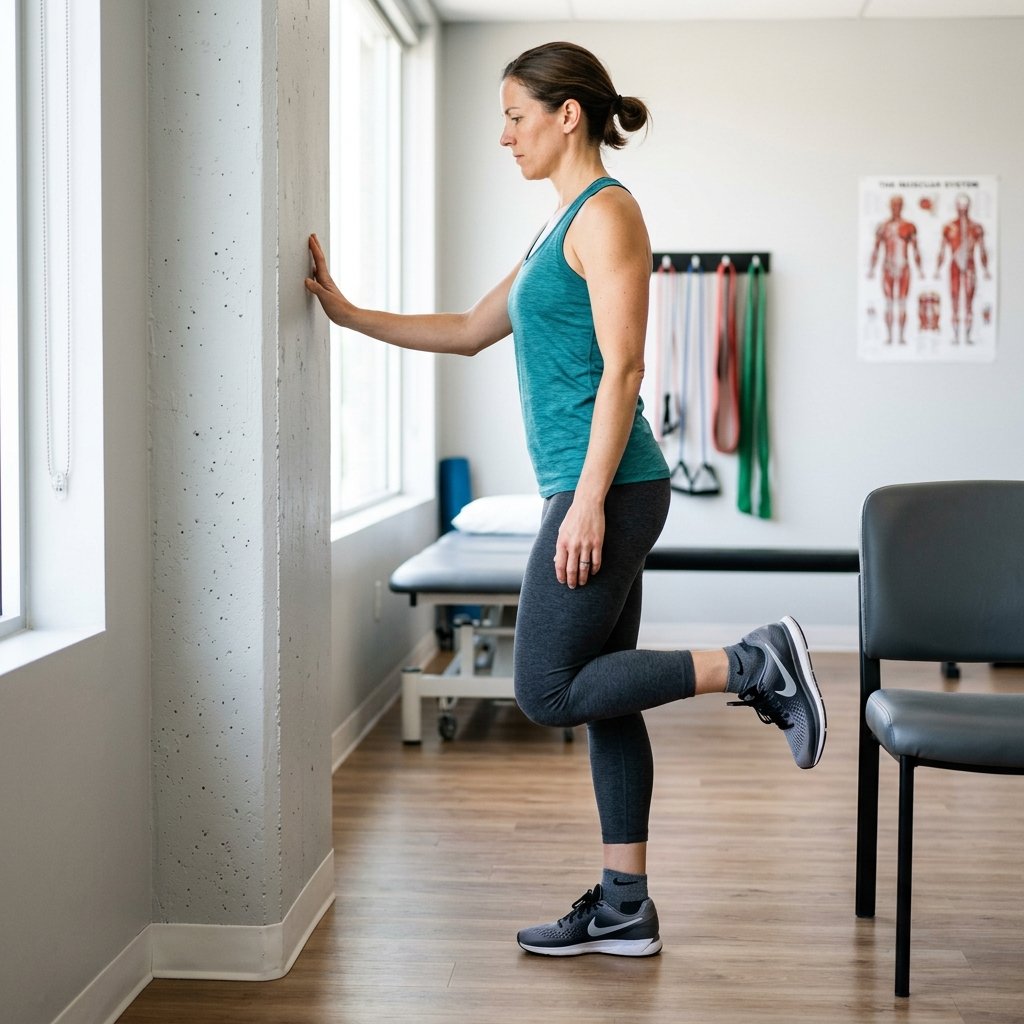
6. Standing Hamstring Curls
Strengthening the hamstrings helps balance the forces around the knee joint, preventing abnormal tracking of the kneecap.
- •Target Muscles: Hamstrings (biceps femoris, semitendinosus, semimembranosus).
- •Starting Position: Stand upright facing a wall, sturdy table, or chair back for support. Keep a soft bend in your standing leg.
- •Execution Steps:
- • 1. Keeping your thighs parallel and your knees aligned next to each other, slowly bend your exercise knee.
- • 2. Lift your heel toward your buttocks, bending the knee to approximately 90 degrees.
- • 3. Keep your upper body tall and avoid arching your lower back.
- • 4. Hold the curl for 2 seconds.
- • 5. Slowly lower your foot back to the floor.
- •Prescription: Perform 2 to 3 sets of 10 to 12 repetitions per leg.
- •Common Mistakes: Leaning forward at the waist; moving the active thigh forward or backward; swinging the leg.
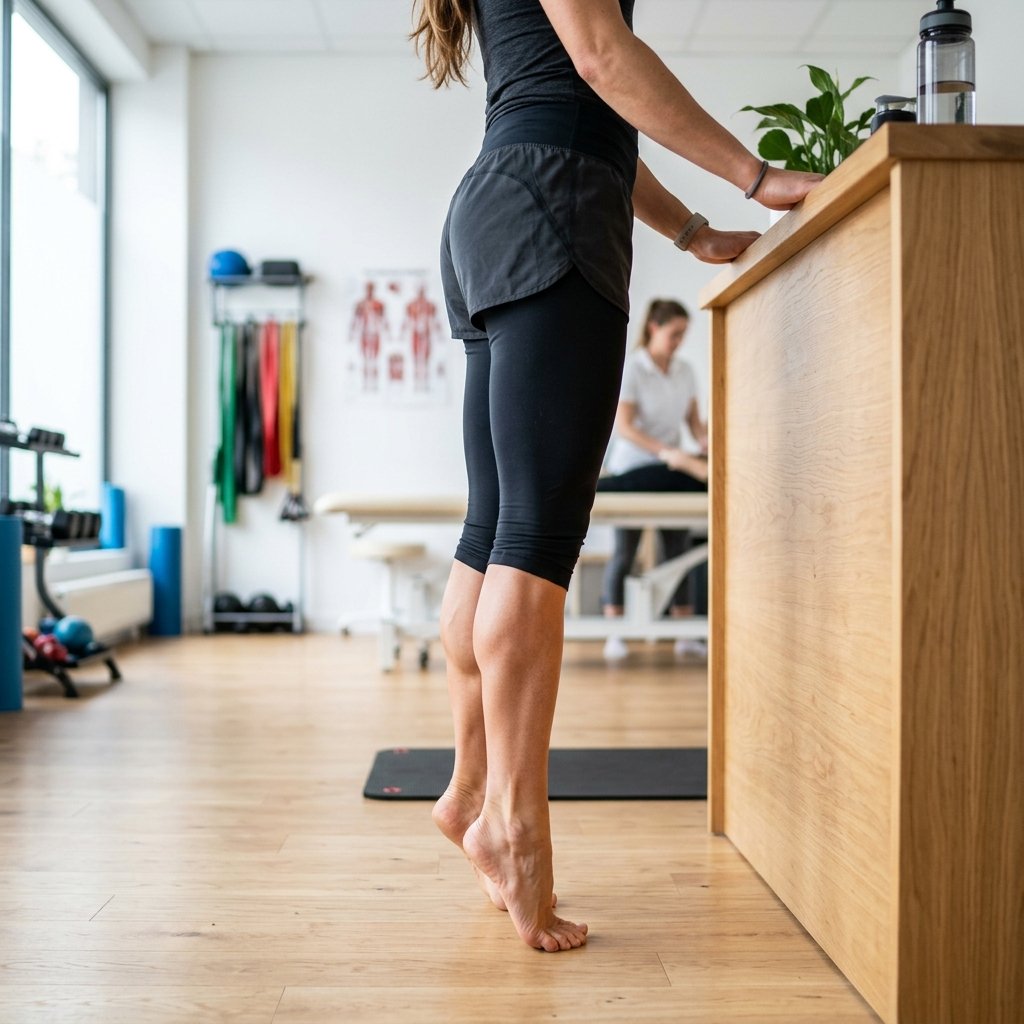
7. Calf Raises
Strengthening the calves helps improve ankle stability and walking gait mechanics, reducing the impact transmitted up to the knee.
- •Target Muscles: Gastrocnemius and soleus (calves).
- •Starting Position: Stand tall with your feet hip-width apart, holding onto a chair, wall, or counter for balance.
- •Execution Steps:
- • 1. Distribute your weight evenly across the balls of your feet.
- • 2. Slowly lift your heels off the ground, rising up onto the balls of your feet.
- • 3. Keep your knees straight but not locked.
- • 4. Squeeze your calf muscles at the top and hold for 2 seconds.
- • 5. Slowly lower your heels back to the floor with control.
- •Prescription: Perform 2 to 3 sets of 15 repetitions.
- •Common Mistakes: Bending your knees; leaning forward; dropping down too fast.
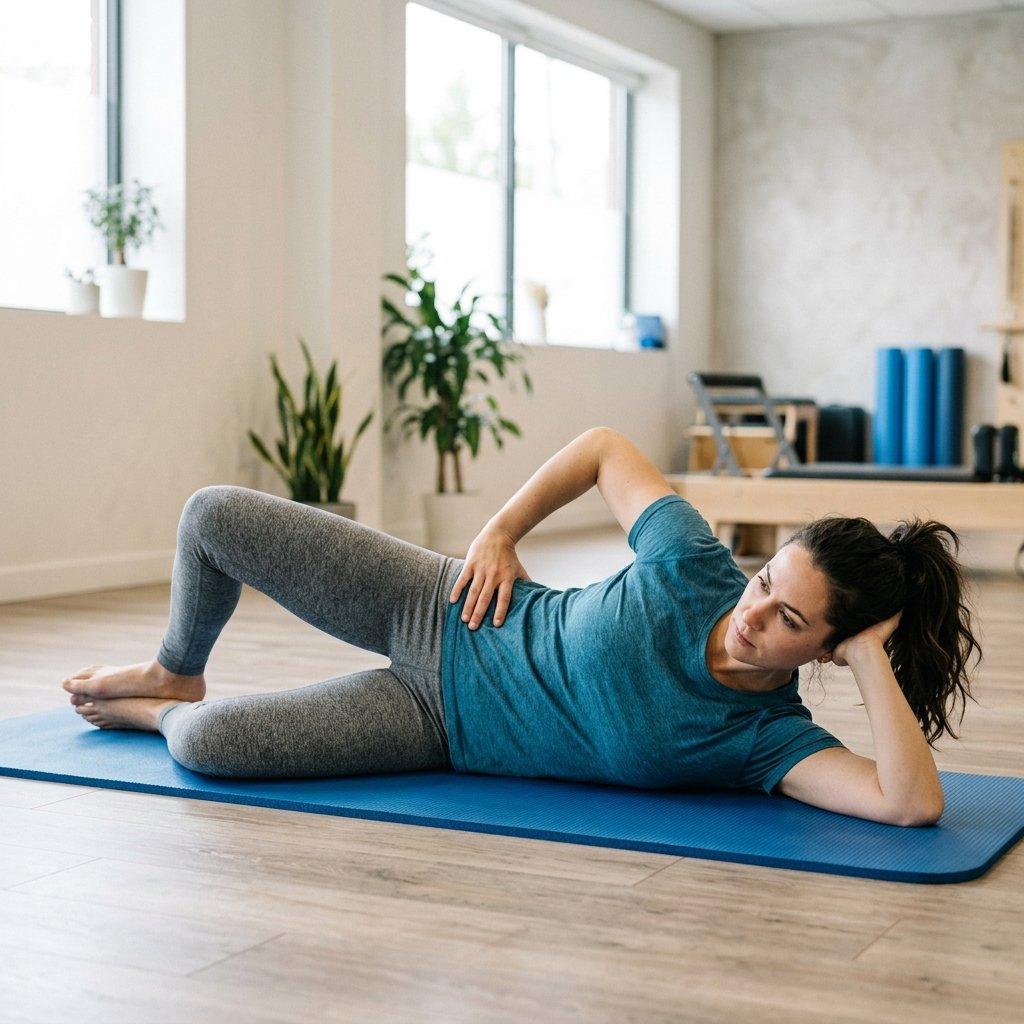
8. Clamshells
Strengthening the outer gluteal muscles is critical because these muscles control hip rotation and prevent the knees from collapsing inward during walking.
- •Target Muscles: Gluteus medius (hip abductor / outer glute).
- •Starting Position: Lie on your side on an exercise mat with your hips stacked and knees bent at a 90-degree angle. Rest your head on your arm or a pillow. Keep your heels together.
- •Execution Steps:
- • 1. Keeping your feet in contact with each other, slowly lift your top knee as high as comfortable.
- • 2. Do not rotate your pelvis or tilt your lower back backward during the movement.
- • 3. Hold the open position for 2 seconds.
- • 4. Slowly lower your knee back to the starting position.
- •Prescription: Perform 2 sets of 10 to 12 repetitions per side.
- •Common Mistakes: Rolling the hips backward; lifting the feet apart; moving too quickly.
Low-Impact Cardiovascular Exercises
In addition to targeted local strengthening, general cardiovascular fitness is a pillar of arthritis management. High-impact activities like running or jumping apply joint loads up to 5-7 times your body weight, which can aggravate arthritic joints. Low-impact cardiovascular exercises keep your heart healthy and muscles active while protecting your knee joints:
- •Stationary Cycling: Cycling provides continuous, non-impact range of motion. The pedal rotation gently pumps synovial fluid through the knee. Ensure the seat height is set so your knee has a slight bend (15 degrees) at the bottom of the pedal stroke to avoid over-stretching or excessive compression.
- •Water Therapy (Hydrotherapy): Walking in water or swimming is ideal because the buoyancy of water supports up to 80-90% of your body weight. This significantly reduces joint load while water resistance builds muscular strength.
- •Elliptical Trainer: The elliptical machine mimics the walking motion but eliminates the heel strike impact, making it a great alternative to treadmill walking.